

Add a logo / graphic to a form or label
At the Designer screen:-
● Select: Tools - Picture
or
![]() Select the option on the object Toolbar
Select the option on the object Toolbar
The program prompts with a dialog to select the type of picture.
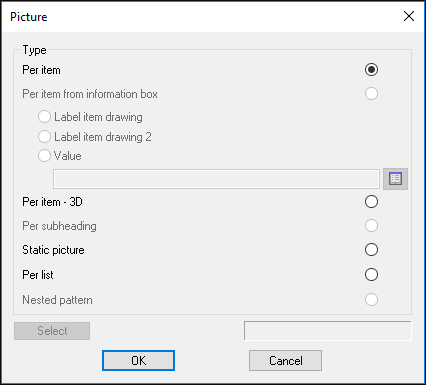
Per item - a picture for the Item section of the Form, for example, a picture for each line. The part or product code is used to identify the picture.
Per item from information box - selecting this option enables three further options - Label item drawing, Label item drawing 2 and Value.
Label item drawing and Label item drawing 2 - If one of these is selected then the drawing filename will be taken from the Label item drawing or Label item drawing 2 information box. This is found in the Other section of the information box types as shown in the drawing below:
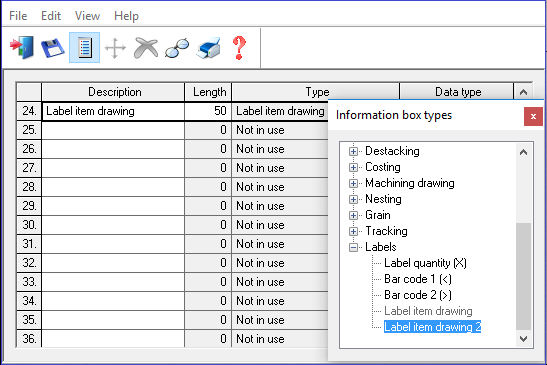
The information box will contain a filename and extension. (e.g. MDFGRAIN.JPG). The filename should be located in the path for pictures (or the path for library data if the path for pictures is left blank).
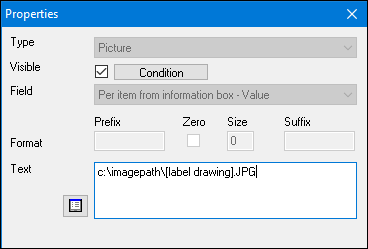
Value - If this option is selected then a string formulae can be entered in the edit box to specify a path, filename and extension. The filename will usually be based on an information box which can be selected via the selection dialog (to the right of the edit box).
e.g. "c:\imagepath\"+RIGHT([label item drawing], 4)+".JPG"
This would take the last 4 digits of each label item drawing information box and use this as a JPG file in the c:\imagepath\ folder.
After a picture item is created the properties can be edited via the existing properties dialog.
For Value style per item information box drawings, there is a button to the left of the text edit box which is used to select an information box name.
The information selection dialog
The button at the end of the edit box is used to select an existing information box
Note: This option is not available for Product requirements, Run forms (materials / patterns and boards) or Online label PC labels
Per item - 3D - This will display a 3D product drawing on a quote and product requirement form/label.
Static picture and Per list are pictures for the Header section of the Form - one per Form or Label. Fixed pictures are selected from the SELECT button. The pictures are in a standard Graphics format (BMP or WMF).
Nested pattern - This will print the entire pattern on the label with the current part / offcut highlighted in white (see below). This is only available for Online labels.
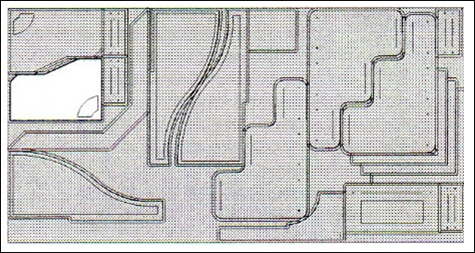
Nested pattern label
Per subheading - a picture for each different sub heading. The subheading is set by the Sort category for the form or label (Parameters - Edit - Rules). Where the sort category is an item related to a picture such as a Part code, Product code or Material code the label includes the relevant picture.
This is the list of fields and pictures that can be used.
Form type Sort category Drawing produced
Quote Code Product, part, fitting or operation
Products Code Product
Parts/Cut lists Code Part
Material Code Material
Information box - product code Product
Cut Patterns Code Part
Material code Material
Information box - product code Product
Runs (Parts) Code Part
Material Code Material
Runs (boards) Code nothing
Material code Material
Runs (materials) Code Material
Runs (patterns) Material code Material
 Drag the item to
the form
Drag the item to
the form

Left click at an edge to drag and resize
Left click on the item and drag to move it
Right click for properties
![]() Use properties to change and position the item accurately
Use properties to change and position the item accurately
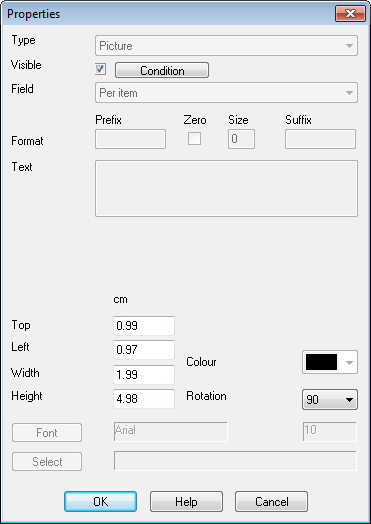
Rotated pictures
Pictures that are placed on forms/labels (not saw labels for the saw) can be rotated by 0, 90, 180 or 270 degrees. Note - this is only for external bmp and jpeg files.
Notes
- There can be more than one picture on a form. For example, one object for the company logo and another object to represent a shaded area.
- Other items can be placed over pictures - this is useful for producing shaded areas but check the effect carefully as this depends upon the characteristics of the picture.
- To add a drawing (for parts or products) to the template set up a box for the drawing and set the Property TYPE to ITEM and set the FIELD to DRAWING. The drawing is automatically scaled to fit the size of the box.
- Drawing is either an entry in the drawing library or is separate bitmap file. The program looks for a drawing code with the same name as the part or product code and if this is not found searches for a bitmap file with the same name.
- Any separate files must be placed in the User profile directory
- The drawings library should be in the directory set by the System parameter: Path for library data
- Order number bit map - a bitmap or metafile with the same name as the order number - (this is only useful for forms). For example, for the part list file Parts20.PNL you can display a picture Parts20.BMP and for the product requirements file PROD1.REQ you can display a picture from PROD1.BMP
- WMF files with a RASTER layer cannot be used