

How to work with the form designer
On selecting a form or label design the screen moves to the Designer screen
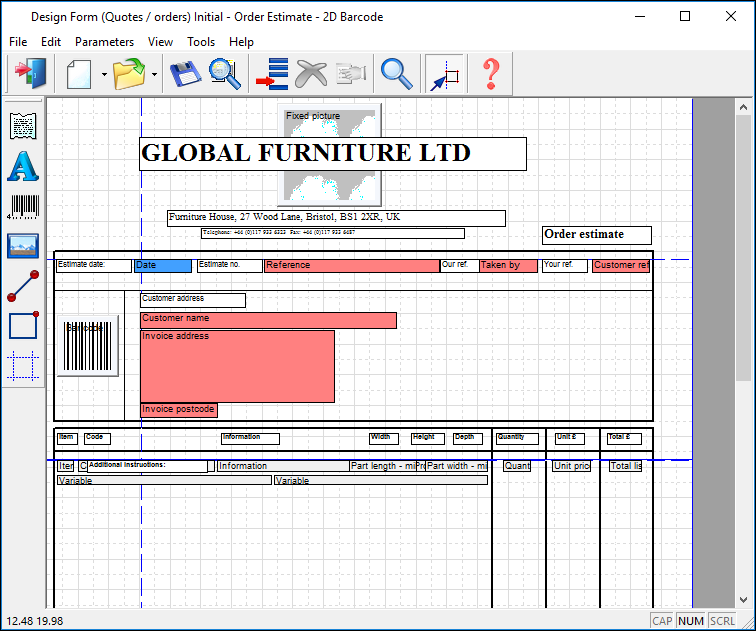
At the left are the form design objects linking to the data. To add an item such as a text box, picture or data field to the form click on the object at the left and drag it to the design area.
At the top are a set of tools such as Preview and Save - to work with the design.
Click on an object to set its properties, this includes, style, position and the text displayed. For the data field object use the properties to select the data required, for example, part length, part width, run quantity etc.
Once the design or template is saved it can be used by the program for printing that style of label or form.
Standard templates - There are several standard templates supplied with the software to use as a starting point for your own templates. Use the SAVE AS option to take a copy of the standard form and always make changes to the copy (All templates are either stored in the 'Path for data' for a User profile or in the 'Path for Forms / Labels' (if this is set). The template files can have any name you choose and have an extension TLF
Copying objects - When the object is added it either has the default size and setting or is a copy of the object that is currently selected on the template. Use this feature to quickly add copies of an object to the template. Select the object you want to copy (by clicking on it) and then select the ADD button. Position the object using the mouse. It is best to position the object approximately and fine tune the position by adjusting the PROPERTIES.
Labels and Forms - Labels and forms are different. A label usually contains 1 set of data, for example, there is one label for each part. In contrast a Form can present the parts as a list of items. When working with form type data continuation pages and headers and footers may also be required
Preview and data preview - a preview shows the approximate layout using 'xxxx' to stand for data - but in some cases a more accurate preview is needed, for example, to check continuation pages and lists of items. For this select the option File - Data preview.
Data preview is not available for saw labels
Using keys to position objects - You can also use the keyboard to position objects.
CURSOR KEYS - move 1 pixel
SHIFT+CURSOR KEYS - move 10 pixels
CTRL+CURSOR KEYS - resize box by 1 pixel
![]()