

Assigning a part to a position in a master or template pattern
Parts are assigned via the Grain matching information box at the Part list or in the Part library
● Select the part list (or move to the Part library)
● Move to the part(s) to assign
● Click on the information box: Grain matching
The program displays the Template information dialog.
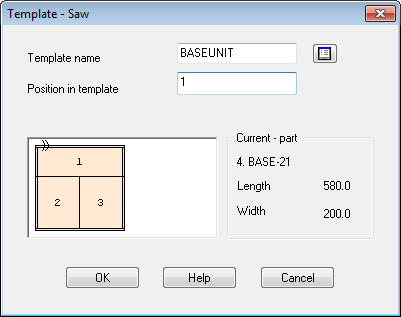
● Select the template to use (using the list box)
● Enter the position of the part in the template.
When the part list is optimised the parts assigned to templates are placed in cutting patterns in the fixed arrangement set by the template
Delete link between part and template - click on the information box for the part. The template information dialog is displayed. Delete the template code in the box at the top of the dialog and select Enter/Return or move off the box.
Part position - enter the positions as numbers separated by a space e.g. 1 2 3 or use the mouse to select or de-select the position for a part.
Parts in more than one position - it is sometimes necessary to specify more than one position for a part. For example, with drawer fronts this may be specified as part DR/A with a quantity of 3. In this case each of those three parts need to be positioned on the template so that the grain matches across all three drawer fronts. To do this just select the part in the usual way for each position.
Trims and saw blade thickness in template patterns - Template patterns can be generated with different saw blade thickness and trim settings to the main patterns in a run. These values are taken from the original template defined in the pattern library.
![]()