

Drawing option for Machining
● Select: Function - Circle router
or
![]() Select option from the Function Toolbar
Select option from the Function Toolbar
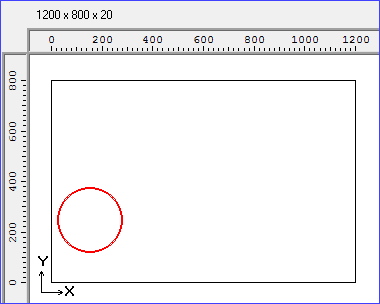

Move the cross hair cursor to the required location
First click - Start
Second click select Radius
● Adjust the values with the Machining instructions pane at the left
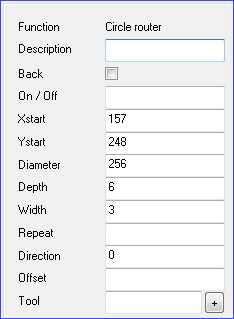
Description - add a description (optional) for the function.
Co-ordinates - Use the Xstart/Ystart values to specify the start point for the centre of the circle.
Diameter - enter the diameter of the circle
Width - enter the width of the rout
Depth - enter the depth of the rout
Repeat - Repeats the operations a specified number of times. This is useful for a line of items. Note that if the repeat is set to a value of 1 the total number of items produced is 2.
Direction - use this to specify the angle of the groove if you are using the Xend value as the length of the groove.
0 - 360 degrees
U - up (0 degrees)
R - right (90 degrees)
D - down (180 degrees)
L - left (270 degrees)
Offset - use this to specify the distance between the repeated items.
Tool - use this box to enter the tool number and other information. Click on the [+] button to enter options via a dialog (this is only available for some types of machining centre).
Tool option - Floating on/off for routers - If 1 is entered in this field then EM="1" is written out to the MPR(X) file when transferring to the machining centre. Alternatively EM=1 can be entered directly in the tool field.
![]()