

Drawing option for Machining
● Select: Function - Saw groove
or
![]() Select option from the Function Toolbar
Select option from the Function Toolbar
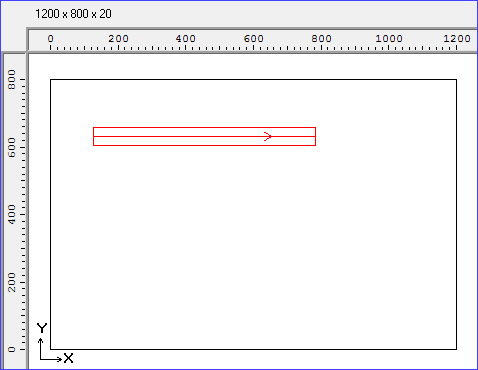

Move the cross hair cursor to the required location
First click - Start
Second click - select End point
Move to create width
Click to confirm Width
● Adjust the values with the Machining instructions pane at the left
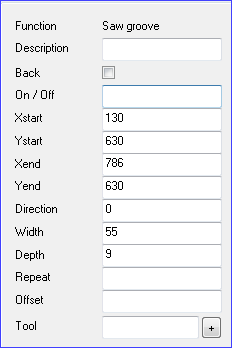
Description - add a description (optional) for the function.
Co-ordinates - Use the Xstart/Ystart and Xend/Yend values to specify the start and end points for the groove. Note that you can also used the Xend box to enter the length of the groove and in the case you also enter a direction for the groove in the direction box.
Width - enter the width of the rout
Depth - enter the depth of the rout
Repeat - Repeats the operations a specified number of times. This is useful for a line of items. Note that if the repeat is set to a value of 1 the total number of items produced is 2.
Direction - use this to specify the angle of the groove if you are using the Xend value as the length of the groove.
0 - 360 egress
U - up (0 degrees)
R - right (90 degrees)
D - down (180 degrees)
L - left (270 degrees)
Offset - use this to specify the distance between the repeated items.
Tool - use this box to enter the tool number and other information. Click on the [+] button to enter options via a dialog (this is only available for some types of machining centre).
![]()