

Edit and display options at the Board library screen
The main options are on the Toolbar at the top of the screen. The top pane shows the materials and the lower pane the boards for the selected material.
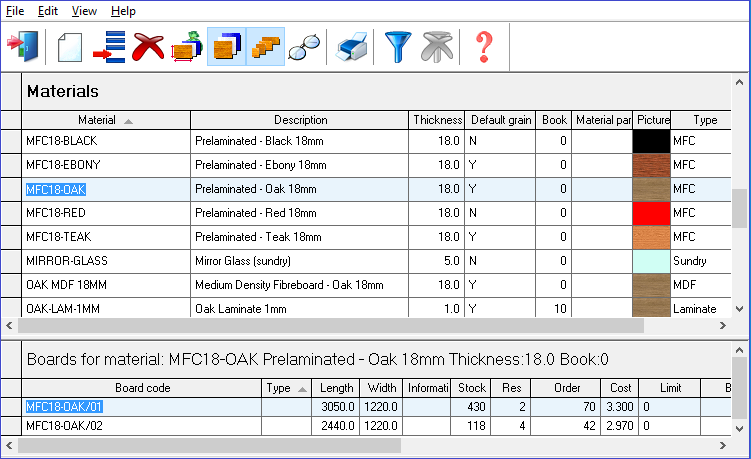

 Click
on a material to see the boards sizes for that material in the pane below.
Use the mouse, keyboard, and navigation keys to move around each list.
Click
on a material to see the boards sizes for that material in the pane below.
Use the mouse, keyboard, and navigation keys to move around each list.
![]() Use the ADD option to insert
a new material or a new board
Use the ADD option to insert
a new material or a new board
![]() Use the DELETE option to
remove a material or board
Use the DELETE option to
remove a material or board
Note - the boards for the material are also deleted
![]() Select the PRINT option
to print a list of materials or boards
Select the PRINT option
to print a list of materials or boards
The print option always prompts for a range of items to print.
![]() -
Add new material or new board size
-
Add new material or new board size
![]() Help
Help
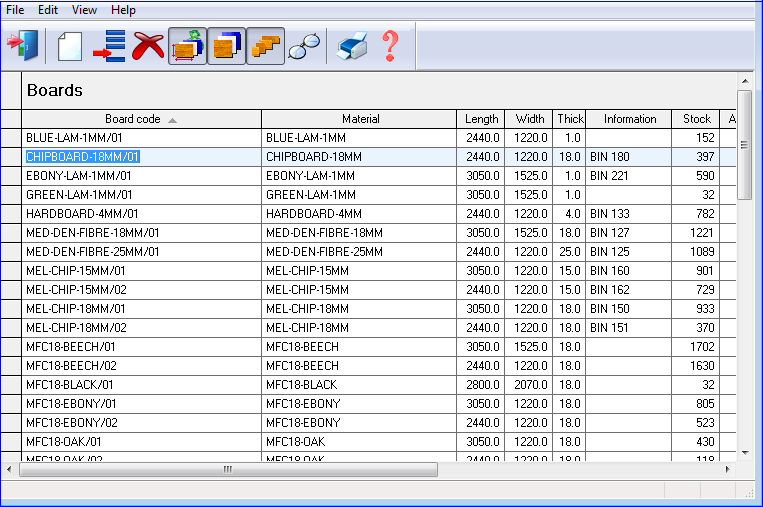
Different views of the library
The library can be viewed in several different ways.
![]() Boards only
Boards only
Show the library as a list of board sizes
![]() Show stock boards only
Show stock boards only
![]() Show offcuts only
Show offcuts only
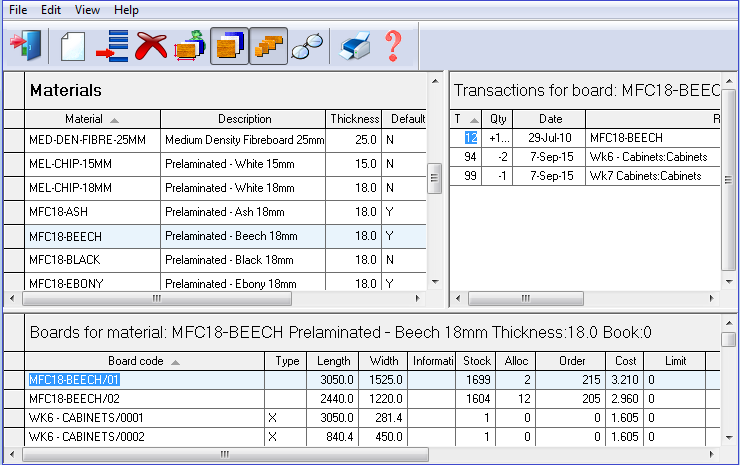
Transactions
If Stock control is in use then the transaction for the current boards are shown in a separate pane.
Sorting
Click on a column to sort each list by the column (descending or ascending order).
View menu
Use the View menu to alter the display of the lists, for example, to hide columns, change column size etc.
Export
Select the menu option: File - Export
This exports the board data to an ASCII file in BDX format.
Editing
The usual editing options are available for each row.
At any row:-
Right
click on a material
or
● Select: Edit
The program displays a pop-up menu.
Cut (Ctrl X)
Copy (Ctrl C)
Paste (Ctrl V)
Clear
These actions apply to each cell. Complete rows cannot be copied as the material or board code must be unique.
![]()