

How to use templates with nested optimising
Templates are pre-defined arrangements of parts for use with the Nesting optimisers. The template specifies the arrangement of certain parts. This is used, for example, for grain matching. To use templates with Nesting do the following.
● Add the information box 'Template router' to the information boxes for parts (Parameters - Information boxes)
At the Machining library:-
● Set the template parameters (File - Drawing properties)
Minimum part separation
Grained material only
Allow - template rotation
● Create templates at the Machining library (Libraries - Machining - New - Template)
● Use the Edit options (Parts, Strips, Waste part) to add items to the template (e.g. Edit - Parts)
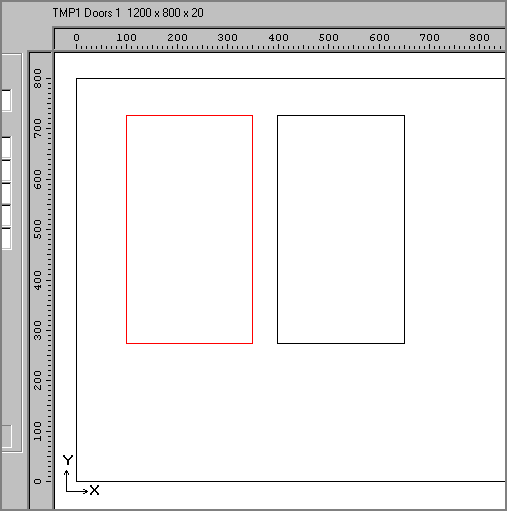
The example shows a template for left and right doors. The template is only a layout; the parts sizes and space between parts are determined from the part list sizes at optimisation so there is no need to draw the template sizes and distances accurately. For more complex layouts use the Strip option to determine which sets of parts need to be kept together.
● At the part list specify the parts that use the template and position the part on the template
● Optimise with a Nesting optimiser in the usual way.
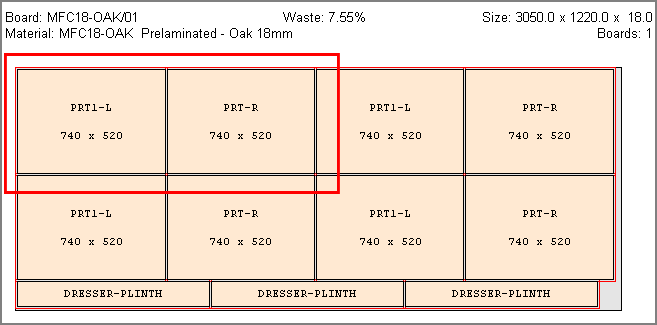
The result is a nesting pattern that preserves the layout for the specified parts.
Notes
- It is sometimes useful to allow optimising where the Nesting template value for 'minimum part separation' is different to the value specified in the nesting parameters, for example to allow some parts to be closer together. In this case the program prompts with a warning before optimising. 'Minimum part separation conflict'.
- User defined safety contours for template parts are ignored when positioning templates in patterns.
![]()