

Patten showing details of all the routes used for the specified route type
The currently selected routing will is shown in light blue, unselected routes are shown in cream:
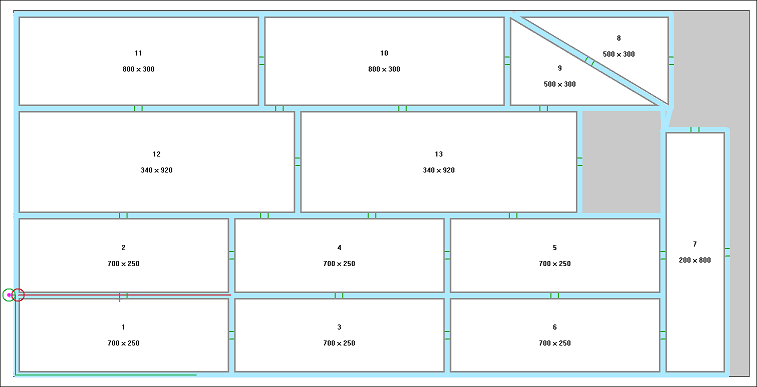
The start and end of the currently selected routing are highlighted with a marker symbol. In addition there is a short section of line drawn to show the start or end direction the routing takes.

Start marker

End marker
If a single routing is selected in the tree view then just that routing will be displayed highlighted.
Tabs and bridges, if present, are marked in green at the start and end:

Routing view
There is a new routing view which can be used to view the progress of a routing and relevant details of the currently selected instruction.
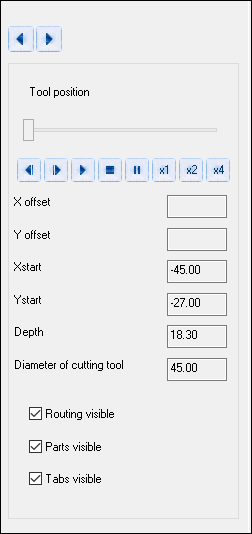
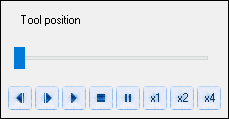
The progress of the routing can be viewed using the slider bar in the routing view:
The current position of the tool is rendered as follows, there is also a red ‘cutting line’ drawn which shows the tools progress so far:
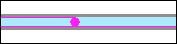
Tool and cutting line
When rendering a common edge routing the cutting edge will follow down the middle of the routing, to show the tools progress.

The tool moves to show two positions for each instruction, its middle and its end. With the start of the first instruction also being shown.
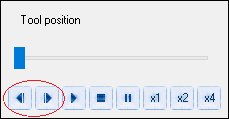
The user can advance or retreat one position at a time using the tool buttons:
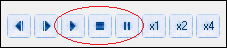
The tool can be animated along the currently selected contour using the newly added animation buttons:
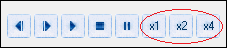
The speed of the animation can be controlled using the animation speed control buttons:
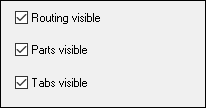
The visibility of the routs, the parts and the tabs and bridges can be turned on and off using the visibility check boxes:
![]()