

Tools for cutting instructions
At the left is a function toolbar with all the typical machining instruction options rout, saw, groove, vertical drill, border ...)
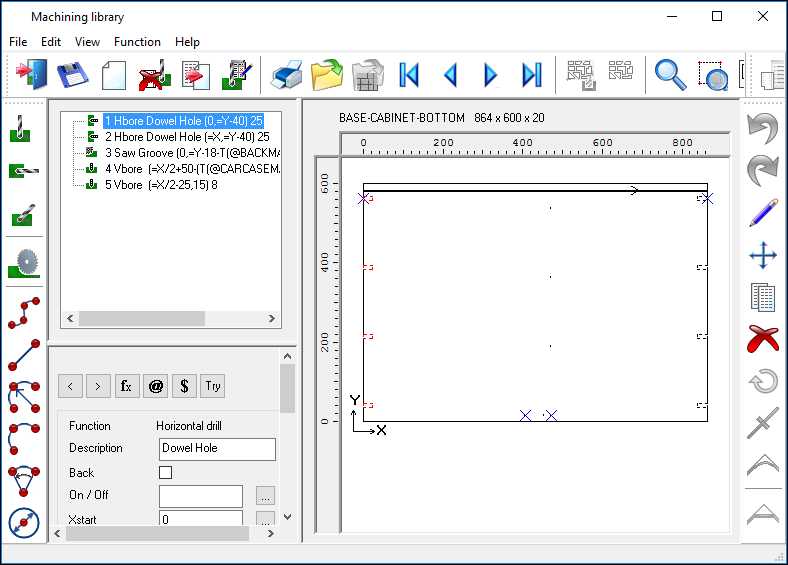
To add a new function (instruction)
● Select a function from the Toolbar
The program displays the Function properties pane (at the left of the drawing)
● Enter the properties (co-ordinates, depth etc).
To edit an existing function (instruction)
● Click on the function (in the drawing) to select it
The drawing of the function is shown in Red and with hashed lines
● Right click pop-up (Edit, Move, Copy, Delete)
● Select Edit from the pop-up
Cursor moves to the Properties pane
● Edit the property values
 Instructions can
also be created and edited using the mouse. The operation changes depending
on the function, for example, whether it is a line or an arc. Refer to
the notes against each function for details. This can be a useful way
of getting a rough layout for the instructions (groove, drill holes ...)
then use the Properties pane to alter the values to exact values (position,
depth etc).
Instructions can
also be created and edited using the mouse. The operation changes depending
on the function, for example, whether it is a line or an arc. Refer to
the notes against each function for details. This can be a useful way
of getting a rough layout for the instructions (groove, drill holes ...)
then use the Properties pane to alter the values to exact values (position,
depth etc).
Other options (at the top of the Instructions pane)
Try - refresh the drawing.
![]() delete
current function
delete
current function

 Use the left and right keys
to step through the functions in the drawing.
Use the left and right keys
to step through the functions in the drawing.
fx @ - Use the formula, variable and buttons to select items from these tables
![]() Insert (at top of
screen) - instructions are inserted before the current instruction
Insert (at top of
screen) - instructions are inserted before the current instruction
Machining instructions dialog
This is the pane at the top left.
Use this list to navigate instructions and move to a specific instruction. Also use this dialog to re-sequence instructions.
See: Machining instructions dialog
![]()