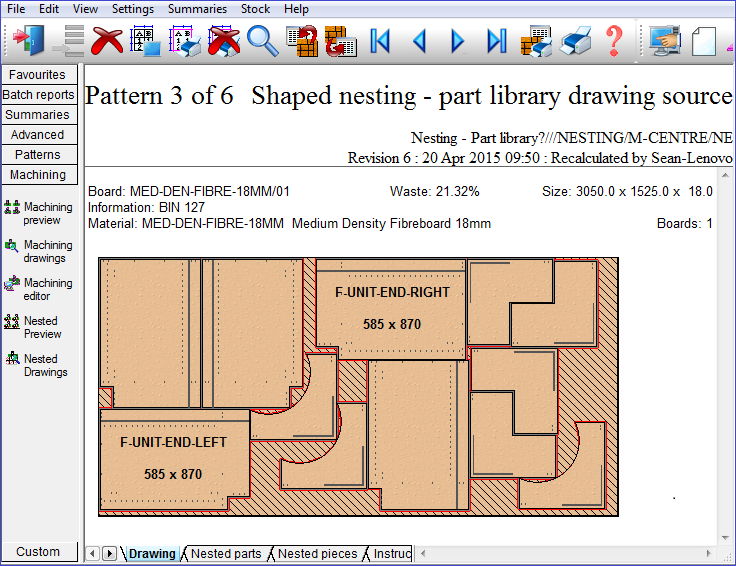

Pattern divided at a Machining centre; typically where the parts are machined.
The program shows the full details of a nested pattern.


Click on the tabs at the foot of the screen to see the sets of machining instructions.
If the board used has a grain then the following indicators will be shown
 for Y grained boards
 for X grained boards
Use the Navigation buttons, Summaries menu or Stacked toolbar to browse the summaries. Many Review Runs options are also available on the top Toolbar
 Navigation
![]() Zoom display in / out
Zoom display in / out
 Move between report levels
![]() Print current report
Print current report
![]() Exit
Exit
For full details of the on-screen options see help topic: Review runs screen
To edit the machining for an individual part select the Machining drawings option from the stacked toolbar and Double click on a drawing to move to the Machining editor. Also move directly to the editor from the Machining editor option on the stacked toolbar.
To view a nested patterns stay down, common edge or piece by piece path in the machining library use the routing view button on the stacked toolbar.

The stay down, common edge or piece by piece path viewer is also available from the edit menu and from the machining tab of the left hand side short cut control:

See: Nested Patterns - Routing View
Pattern labels
The program uses the standard rules for adding part labels to patterns:-
- Part number or part description and part size
- Part number or part description
- Nothing
Whether part number of part description is used is set by the Review runs parameter: Text format - pattern display
For Rectangular nesting - each part can be enclosed within a rectangular area and the label is positioned in the centre of this rectangular area
For Shaped nesting - for each part the centre point of the shape is calculated and the label is positioned at the centre point, that is, the text is not rotated to match the shape or the angle at which the shape is set.
Notes
- MPR(X) files - where the pattern format is MPR(X) both the patterns and the parts are created as MPR(X) files